Contents:
- Understanding Hair Structure and Growth Patterns
- Essential Tools for How to Cut Hair at Home
- Professional Scissors Investment
- Supporting Tools
- Preparing Your Hair and Creating a Game Plan
- Step-by-Step Technique for Basic Trims
- The Two-Mirror Setup
- Section Your Hair
- Establish Your Baseline
- Work Section by Section
- Blend Sections
- Creating Layers and Texture
- Managing Different Hair Types
- Curly Hair Cutting Strategy
- Fine, Straight Hair
- Thick, Coarse Hair
- Common Mistakes and How to Avoid Them
- Aftercare and Maintenance Schedule
- Seasonal Considerations and Timeline
- Frequently Asked Questions
- How much does it cost to learn how to cut hair at home?
- Can I cut my own hair evenly without professional training?
- What’s the best way to cut the back of your head yourself?
- How often should I trim my hair if I’m cutting it myself?
- Will cutting my own hair cause more split ends?
- Moving Forward with Confidence
Most people believe that cutting hair requires years of formal training and a professional salon setting. This is simply not true. Thousands of DIY enthusiasts across the UK have learned how to cut hair with confidence, saving thousands of pounds annually while maintaining excellent results. This guide sets the record straight about what’s actually necessary to achieve salon-quality cuts from your own kitchen or bathroom.
Hair cutting is fundamentally a skill built on understanding shape, angles, and texture. Once you grasp these core principles, the mechanics become straightforward. What separates a mediocre cut from an excellent one isn’t magic—it’s precision, patience, and knowing your hair’s unique characteristics.
Understanding Hair Structure and Growth Patterns
Before you pick up a pair of scissors, it’s essential to understand what you’re working with. Hair grows at approximately 6 inches per year on average, though this varies considerably between individuals. The growth rate is faster in spring and summer, slower in autumn and winter—a seasonal pattern worth considering when planning your cuts.
Hair has a natural growth direction called the “grain.” This invisible map determines how your hair naturally falls and moves. Some hair grows downward and inward, creating cowlicks or whorls near the crown. Understanding your hair’s grain means your cuts will look intentional rather than haphazard, because you’re working with the hair’s natural tendencies rather than against them.
Hair texture significantly impacts cutting technique. Fine hair requires more frequent trims (every 4-6 weeks) to maintain shape, while coarser, thicker hair can go 8-12 weeks between cuts. Curly hair presents unique challenges because it shrinks as it dries, making your initial cut appear shorter than expected. Straight hair, by contrast, shows the true length immediately.
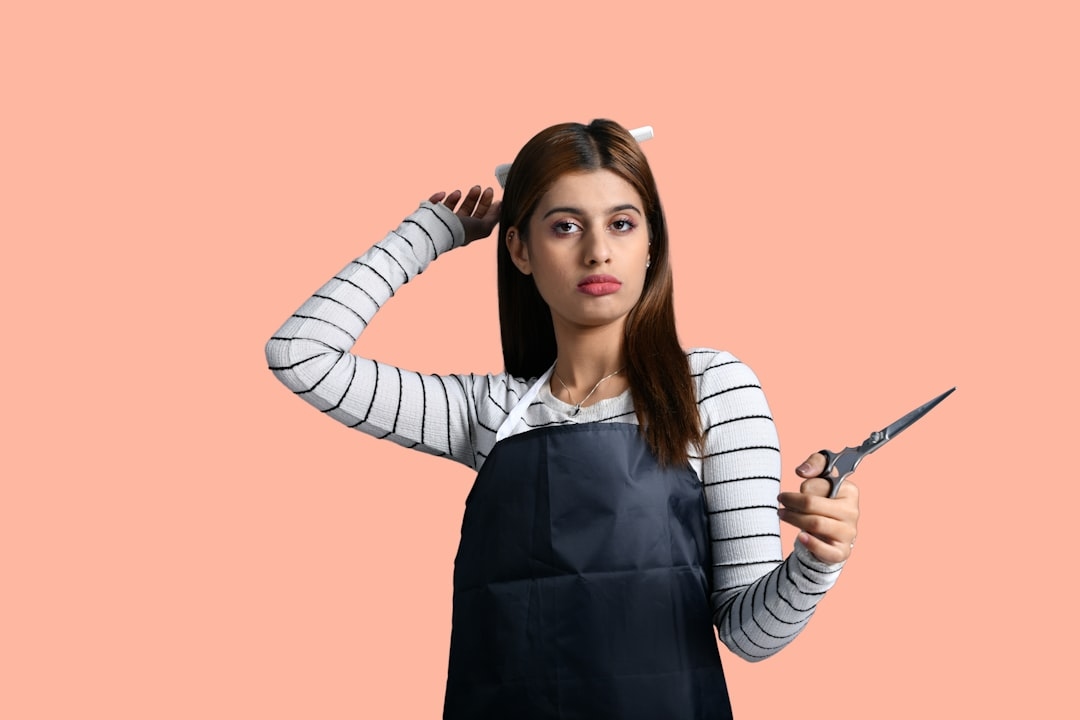
Essential Tools for How to Cut Hair at Home
You cannot cut hair successfully with dull kitchen scissors or craft supplies. The right tools make the difference between a controlled, professional-looking cut and a frayed, damaged mess.
Professional Scissors Investment
Hair scissors cost between £15 and £80 for quality DIY-grade tools. Avoid anything cheaper—these typically have poor blade alignment and won’t cut cleanly. A good pair of 6-inch scissors designed specifically for hair cutting should feel balanced, not nose-heavy. Test them by cutting a single strand of your own hair; it should cut cleanly without crushing or bending the hair.
Hairdressing scissors work on a completely different principle than regular scissors. The blades are sharpened at a specific micro-angle (usually 45-60 degrees), and they rely on precise tension between the blades. Professional-grade scissors (£40-80) will last 2-3 years with proper care. Mid-range options (£20-35) offer decent quality for beginners.
Supporting Tools
Beyond scissors, gather these items:
- Thinning shears: These have a serrated blade on one side. They’re invaluable for removing bulk without creating harsh lines. Cost: £12-25.
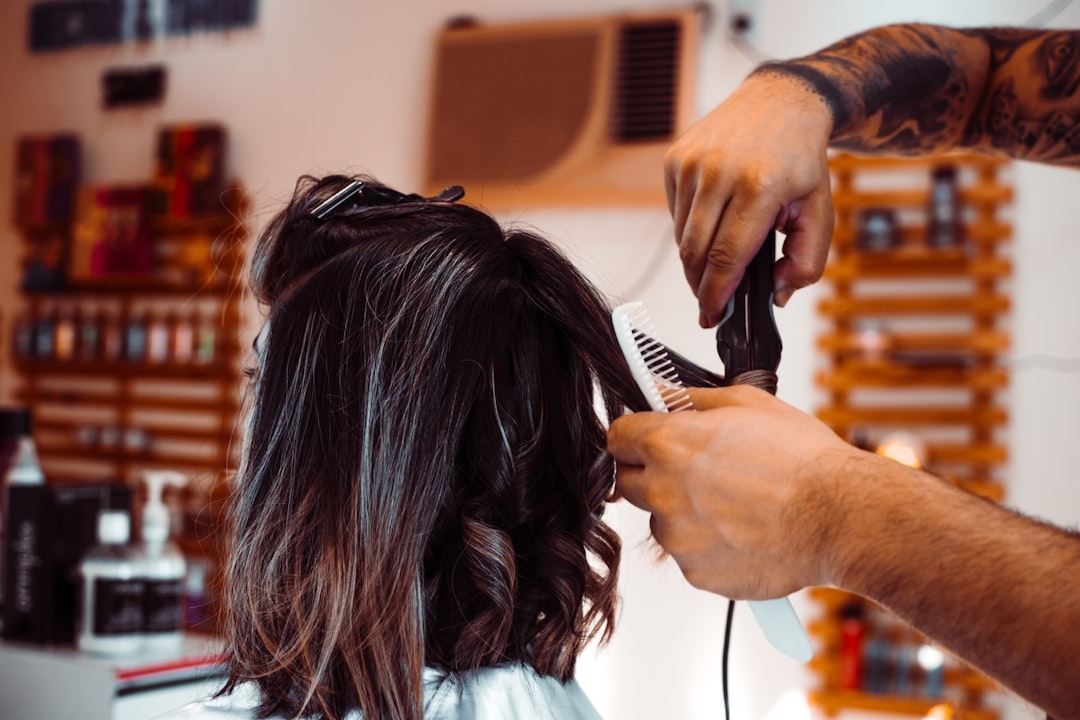
- Comb (not a brush): A fine-toothed comb helps you see exactly what you’re cutting. Combs made from horn or bone are gentler on hair than plastic.
- Spray bottle: Keeps hair damp and manageable. Mist frequently during cutting.
- Hair clips: Section hair into manageable quadrants. Inexpensive and essential.
- Mirror: A large wall mirror plus a hand mirror allows you to see the back of your head. This is non-negotiable.
- Towel: A dark towel around your shoulders catches clippings and prevents them from sticking to wet hair or clothes.
Total beginner budget: £50-100 for scissors and basic supplies. This investment pays for itself after just 2-3 haircuts compared to salon prices (£25-50 per cut in most UK locations).
Preparing Your Hair and Creating a Game Plan
Success begins before the first snip. Preparation determines whether you’ll feel confident or panicked.
Start with clean, damp hair. Wet hair is easier to control and reveals the true length once dry. Pat it dry with a towel—it should be damp but not dripping. Soaking wet hair is difficult to work with and stretches unpredictably.
Comb through thoroughly, removing all tangles. This reveals the hair’s natural fall and growth patterns. If your hair air-dries with a particular wave or curl, dry it in that manner first, then dampen it again for cutting. This accounts for how it will actually look once you’re finished.
The cardinal rule: cut less than you think you need to. Hair that’s too long can always be trimmed. Hair that’s too short requires months of growth to correct. As hairstylist and certified trichologist Marcus Aldridge explains, “Most home cutters remove too much length in the first pass. A conservative initial cut, followed by a second assessment, consistently produces better results than aggressive cutting with hesitant second-guessing.”
Plan your cut by identifying your target length. If you’re trimming, how many inches? If you’re reshaping, what’s the goal—more volume, cleaner lines, blunt ends, or textured layers? Hold up a reference photo. Write down your plan. This prevents decision paralysis mid-cut.
Step-by-Step Technique for Basic Trims
A basic trim removes dead ends without altering the overall length or shape significantly.
The Two-Mirror Setup
Position your main mirror at eye level, roughly 60cm away. Hold a hand mirror behind your head to see the back sections. Good lighting is critical—position yourself near a window or use a bright overhead light. Shadows make it impossible to see what you’re actually cutting.
Section Your Hair
Divide hair into four quadrants using clips. Part down the center from forehead to nape. Part horizontally from ear to ear across the crown. This creates four manageable sections. For thick hair, create more sections (six or eight). For fine hair, four sections usually suffice.
Establish Your Baseline
Start with the longest section (usually the front, since hair is typically longer on the sides than the back). Take a small subsection between your fingers. Pull it straight down gently—not yanked, just enough tension to see the full length. Using straight, vertical scissors, make your first cut perpendicular to the strands. This creates a blunt, clean line.
Remove no more than half an inch on the first pass. Step back. Assess. Most people’s first instinct is to cut more than necessary. Resist this impulse.
Work Section by Section
Work through each section systematically. Use your first cut as a guide. If your first section established a 15cm length, use that as the baseline for remaining sections. This creates consistency.
For the back sections, use the two-mirror system. Look in the hand mirror to see what you’re doing. Many people find this awkward initially. Practice your hand positioning and mirror angles before cutting—it becomes second nature quickly.
Blend Sections
Once all sections are trimmed, blend the lines between them. This prevents harsh demarcations. Take hair from one section and slightly into the next, angling your scissors slightly inward at roughly 45 degrees. This softens transitions.
Creating Layers and Texture
Layers add movement and reduce bulk. They’re more advanced than a simple trim but absolutely achievable for DIY enthusiasts.
Layers work by creating different lengths throughout the hair. Shorter layers at the crown create lift and volume. Longer layers around the perimeter provide movement and flow. The angle at which you cut determines the effect. A horizontal cut (parallel to the floor) creates blunt layers with obvious demarcation. An angled cut creates feathered, blended layers.
To cut basic layers, section the hair into quadrants. Within the back quadrant, take a vertical subsection. Hold it straight up from the scalp at 90 degrees (perpendicular to the head). Cut horizontally across the ends. The shorter this is, the more volume you create at the crown. Typically, aim for 2-4cm shorter than your baseline length at the crown.
Work around the head in vertical sections, maintaining consistent tension and angles. For side layers, angle the hair 45 degrees away from the head, creating longer layers that blend into the perimeter length. This prevents a harsh “choppy” appearance.
Thinning shears help tremendously with layers. They remove bulk without creating obvious lines. Use them on the ends of layered sections to create texture and movement. Never use thinning shears near the scalp on short layers—this creates an unflattering, disconnected appearance.
Managing Different Hair Types
Curly Hair Cutting Strategy
Curly hair requires a modified approach. Cut curly hair dry, in its natural curly state, not straight and damp. This is because curly hair shrinks significantly—sometimes by 4-6 inches—when it dries. Cutting it wet creates an unpleasant surprise when it dries much shorter than expected.
With dry curly hair, you can see exactly where the ends fall naturally. Use your fingers to separate curls rather than combing, which disrupts their pattern. Make small cuts—curls are less forgiving than straight hair. Remove no more than quarter-inch at a time.
Thinning shears are especially valuable for curly hair, as they remove bulk while maintaining definition and bounce. Avoid straight blunt cuts across curls; angled cuts and point-cutting techniques work better.
Fine, Straight Hair
Fine hair requires more frequent trims (every 4-5 weeks) to maintain shape because split ends become visible quickly. Use very sharp scissors—dull blades will bend rather than cut fine strands, creating breakage. Work methodically and deliberately; fine hair doesn’t hide mistakes as easily as thick hair does.
Thick, Coarse Hair
Thick hair is more forgiving of minor imperfections. You can remove slightly more length and create bolder layers without risk of looking too short. Thinning shears are particularly valuable, as they help manage bulk. Work in smaller sections since thick hair is harder to maneuver.
Common Mistakes and How to Avoid Them
Cutting while hair is completely dry: Dry hair is unpredictable and harder to control. It also makes it difficult to see exactly what you’re cutting. Always work with damp hair.
Using dull scissors: Dull blades crush rather than cut, causing fraying and breakage. Test your scissors regularly on a single strand. If it doesn’t cut cleanly, sharpen or replace them.
Cutting too much too quickly: This is the most common mistake. You can always cut more, but you can’t put it back. Be conservative on the first pass.
Uneven tension: Hold hair with consistent tension throughout the cut. If you pull harder on one side than the other, the cut will be uneven. Consistent, gentle tension produces the best results.
Ignoring the hair’s grain: Working against your hair’s natural growth pattern creates a fight. Observe how your hair naturally falls and work with it, not against it.
Poor lighting: You cannot see what you’re cutting in poor light. Position yourself near natural light or use a bright overhead lamp and a hand mirror.
Cutting when tired or rushed: Hair cutting requires focus and patience. If you’re stressed or tired, postpone the project. Mistakes made in this state are costly.
Aftercare and Maintenance Schedule
Once you’ve mastered how to cut hair, develop a maintenance routine. Regular trims keep your hair looking fresh and healthy between cuts, whether you’re doing them yourself or visiting a salon occasionally.
Most hair benefits from a trim every 6-8 weeks, though this varies by texture and style. Fine, straight hair needs trimming every 4-6 weeks. Coarser, curly hair can go 8-12 weeks. Mark your calendar. This removes dead ends before they split further up the shaft, maintaining the overall health and appearance of your hair.
Between cuts, maintain hydration. Use a quality conditioner appropriate for your hair type, and apply a leave-in conditioner or oil to ends weekly. This prevents split ends and reduces the frequency of trims needed.
Keep your scissors clean and properly maintained. Wipe them after each use and store them in a dry place. Have them professionally sharpened annually (cost: £8-15), which is far cheaper than replacing them.
Seasonal Considerations and Timeline
Hair growth and cutting schedules can be aligned with seasonal changes. During spring and early summer, when hair grows fastest, you might trim every 4 weeks. In autumn and winter, when growth slows, extend to 6-8 weeks between cuts. This accounts for natural biological rhythms.
Summer months present additional challenges: sun exposure, saltwater, and chlorine all damage hair and accelerate split ends. More frequent trims during summer (every 4-5 weeks) help maintain health. Autumn is an excellent time for bolder cuts or color changes, as hair damage from summer becomes visible and removal is justified.
Winter dryness affects hair texture significantly. Heating systems indoors and cold outdoor temperatures create a harsh environment. During winter, prioritise hydration and consider leaving slightly more length to allow for split ends without compromising style.
Frequently Asked Questions
How much does it cost to learn how to cut hair at home?
Initial investment ranges from £50-100 for quality scissors and basic supplies. This pays for itself after 2-3 cuts compared to professional salon prices of £25-50 per cut in the UK. Long-term savings are substantial—approximately £200-300 annually if you cut your own hair every 8 weeks instead of visiting a salon.
Can I cut my own hair evenly without professional training?
Yes, with practice and patience. The key is working methodically with good lighting, using sections to maintain consistency, and cutting less than you think necessary on the first pass. Most people succeed within 2-3 attempts as they develop the skill.
What’s the best way to cut the back of your head yourself?
Use two mirrors—one large wall mirror at eye level and one hand mirror positioned behind your head. This allows you to see what you’re cutting. Alternatively, some people find it easier to have a trusted friend assist with back sections, at least initially. Alternatively, cut the back sections in smaller subsections using your fingers to guide the scissors rather than trying to see everything at once.
How often should I trim my hair if I’m cutting it myself?
For most people, every 6-8 weeks maintains optimal appearance and health. Fine hair benefits from 4-6 week intervals, while coarser, curly hair can go 8-12 weeks. Establish a routine and mark your calendar—consistency prevents last-minute panic trims.
Will cutting my own hair cause more split ends?
Not if your scissors are sharp and your technique is sound. Dull scissors or poor technique cause split ends by crushing rather than cutting hair cleanly. Sharp professional-grade scissors create clean cuts that don’t split. Regular maintenance trims (every 6-8 weeks) actually reduce split ends by removing them before they damage more of the hair shaft.
Moving Forward with Confidence
Learning how to cut hair is an achievable skill that pays dividends for years. You’ll save thousands of pounds, gain valuable hands-on expertise, and develop a deeper understanding of your own hair. The investment in quality tools and practice time is modest compared to the long-term savings and satisfaction of managing your appearance independently.
Your first attempt may feel awkward. This is normal. Take your time, follow the systematic approach outlined here, and trust the process. By your third or fourth cut, the mechanics become intuitive. Within a year, you’ll possess a skill that most people assume requires years of professional training.
Start with a simple trim to build confidence. Once you’re comfortable with basic cuts, experiment with layers and texture. Progress at your own pace. The best time to master how to cut hair was years ago; the second-best time is today.